|
2-Needle Mittens
many thanks to Bev Qualheim for allowing me to adapt her pattern for this knit-a-long. The original pattern, along with many other wonderful designs, can be found here: www.bevscountrycottage.com/the-mitts.html |
|
|
|
|
|
sizes: 2/3 yrs (circ. 5.5"/14cm), 4/5 yrs (circ. 6"/15.25 cm), 6/7 yrs (circ. 6.5"/16.5cm), 8 yrs/wm sm (circ. 7"/17.75cm)
|
|
|
|
|
| materials & gauge:
approx 50 gm/100 yds worsted weight yarn (shown in Cascade 220 - band info: 4.5st/US 8 or 5st/US 7 needles) needles: 4.25mm (US 6) and 3.5 mm (US 4) or size necessary to achieve gauge gauge: 22 st/29 r = 4"/10 cm |
|
|
|
|
| DAY 1
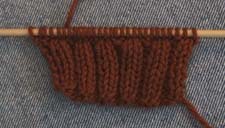
CAST ON AND RIBBING Using smaller needles, cast on 24(28/28/32)st using a longtail or German twisted cast on to create a stretchier edge. Beginning on a wrong-side row, work in k2, p2 ribbing until cuff is 1½”(1¾”, 2”, 2¼”):(3.8cm/4.5cm/5.1 cm/5.75cm) long, or to desired length. end ready to work a RS row. incr round: transitioning to larger needles, k1(1/1/2), m1. [k 6(7/7/8)] 3 times. end k1(2/2/2) FOR SIZE 6/7 ONLY, work one more incr round as follows: k8, m1, k16, m1, k to end of round. 28(32/34/36) st |
 |
| DAY 2
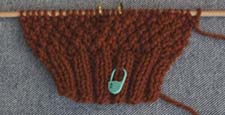
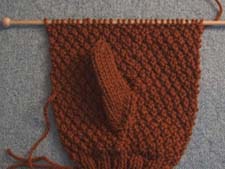
LOWER HAND AND THUMB INCREASES Beginning with a WS (purl) row, work in stockinette (knit on RS, purl on WS), until piece measures 1¼”(1½”, 1¾”, 2”):(3.2cm/3.8cm/4.5cm/5.1 cm) from ribbing. end ready to work a RS row. Knit 13(15/16/17) sts, place a marker on needle, incr 1 st in each of the next 2 sts, place a marker on needle - 4 sts between markers, knit to end of row. Purl 1 row. Continue in stockinette st, (knit one row, purl one row) incr in the 2nd st after 1st marker and 2nd st before 2nd marker, on RS (knit) rows only, until there are 12/14/16/16 sts between markers then knit to end of row. Purl 1 row Knit 1 row without increasing. Next row: Purl 14(16/17/18) and slip these sts onto waste yarn or a stitch holder. Purl next 10(14/16/16) sts of thumb. Slip rem. 14(16/17/18) sts onto waste yarn or a stitch holder. |
|
| DAY 3
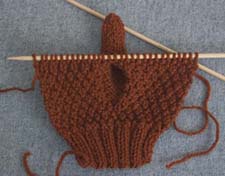
THUMB Work in stockinette st until thumb measures 1½”(1¾”, 2”, 2¼”):(3.8cm/4.5cm/ Next row: k2tog across row. Cut yarn leaving a 6"/15cm tail of yarn. Weave the yarn through the remaining thumb sts and fasten. Sew the thumb seam. |
 |
| DAY 4
UPPER HAND With the WS facing, place st from the waste yarn onto a needle beginning at the left side (if right handed). Pick up 2 st in the edge of the thumb before placing the second set of st onto the needle. attach yarn and purl to the end of the row. (30/34/36/38 st) Knit across row, evenly incr/decr -2(-2/0/+2) sts on this row only. (28/32/36/40) Purl across row Continue in stockinette st until the mitten is 3”(3¾”, 4¾”, 5¼”):(7.6cm/9.5cm/ |
 |
| DAY 5
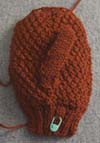
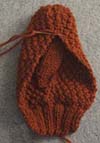
DECREASES AND FINISHING Row 1: *k2tog , knit 2, repeat from * across row, ending k2tog Row 2: Purl. Row 3: *k2tog , knit 1, repeat from *across row. Row 4: p2tog across row. Cut yarn leaving 12" yarn for seaming the mitten. Draw yarn through remaining sts and sew seam at side. |
  |
|
|
|
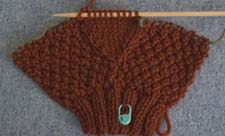
| the mitten in these photos was created with a modified seed st pattern on the hand: row 1 / 2: *k1, p1. repeat from * across row 3 / 4: *p1, k1. repeat from * across if using a stitch pattern, you may choose to work the area between the markers for the thumb gusset and the decreases in plain stockinette as is illustrated in the photos. |
|
|
|
|
|
|
|
Pictures & Patterns ©2001-2031 p2 designs, |
|
